Friday, April 6, 2012
Almost Done Sanding Steam Trunk
I'm almost done sanding. Just cleaning up the edges. I should have this part of the project completed sometime next week. I'll post some pictures soon.
Saturday, March 17, 2012
Still Sanding
I'm still sanding this thing. I took a nice break, and just got back to sanding the other day. I should finally be done with the sanding by next week hopefully. I now officially hate sanding. Anyway once that's done I'll be on to funner parts of the project. Check back soon for updates.
Tuesday, February 21, 2012
Update
I'm just not feeling the sanding this week, so I'm taking a week off. There are four panels left to sand and I will get to them next week sometime. After I take care of these panels, there is some work that has to be done to the bottom of the trunk and then I can start staining and reconditioning this thing. Ughh, I hate sanding ! Check back soon for updates .
Friday, February 17, 2012
Remove Steam Trunk Handles
It's time to remove those old crappy worn out steam trunk handles. The one is severely dry rotted and the other one is completely broke. Once these handles are removed from the steam trunk I can finally finish sanding this thing. I love sanding :(
I purchased a tack puller from the local hardware store. At the store I shopped at they were mixed in with the screwdrivers. The tack puller only cost $5.97 and was well worth the investment. It made removing the steam trunk nails much easier.
The first thing I did was find the nails on the inside of the trunk. I had to scrape a bit of the old interior away but the nails were fairly easy to find.
You then get your tack puller and gently try to get behind the nail and bend it up. Once you have the nails bent up, you can give them a little tap with your hammer to help loosen the trunk handle. Be carefull not to crack the nails, I broke two of them. Considering that they're close to 100 years old they seemed a bit brittle.
After the nails were tapped, take the tack puller and see if you can gently pry the handle from the trunk. Be careful not to bend or further damage the steam trunk handle assembly.
Now take a pair of nippers, and gently pull the nails out. Save all the parts, especially the leather handle. If you can't find a suitable handle, you can use the broken one as a pattern and make your own. That's probably what I'm going to do.
That's it. This was another fairly easy part of the project. It took me about an hour to do the one side, mostly because I'm all thumbs and had no clue what I was doing. After I figured out the process, the other side took less than twenty minutes. This part of the project took roughly 1.5 hours to complete.
Yea, now I can get back to my favorite task of sanding and try to get this old steam trunk prepped for stain.
Project time for this post : 1.5 hours
Total time spent on project so far : 33 hours 15 minutes
Total project cost so far : $39.59 USD
 |
| Broken steam trunk handle, no repairing this, this thing has to go ! |
 |
| Basic tack puller purchased at hardware store. |
 |
| The nails can be found inside the trunk bent into the wood. |
 |
| Carefully try and pull the nails out without breaking the nails, you want to save these and use them to reattach the new handle. |
 |
| Once you have the nails straightened out a bit, give them a light tap with the hammer to further loosen them. |
 |
| Gently pry the handle and loosen it a bit more. |
 |
| Take your nippers and gently pull out nails. |
 |
| Save all parts, the leather can be used to make a pattern for the new handle. |
Yea, now I can get back to my favorite task of sanding and try to get this old steam trunk prepped for stain.
Project time for this post : 1.5 hours
Total time spent on project so far : 33 hours 15 minutes
Total project cost so far : $39.59 USD
Tuesday, February 7, 2012
Remove Steam Trunk Interior
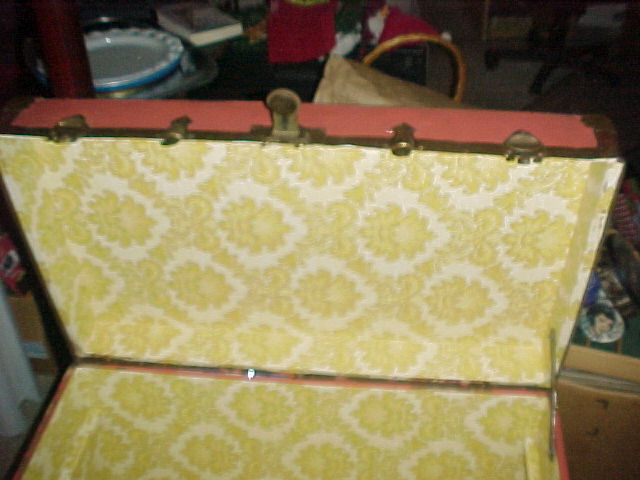
Finally, a part of this project that was fairly simple. I removed the interior of the steam trunk the other day. It was a pretty easy part of the project and only took about an hour.
I removed the interior for a number of reasons. One, it was pretty ugly ! Two, it wasn't the original interior. Three, I wanted to see if the bottom of the trunk was dry rotted, (something I should of done before I got into doing all this sanding, luckily it looks good). Finally, it's a pretty old trunk, it sat in an attic, a basement, a garage and God knows where else, so I wanted to make sure no creepy crawly things were living in there. Luckily, no creepy things. If you have an original interior in your trunk, I wouldn't remove it unless it's in really bad shape. The original interior would increase the value of your steam trunk considerably.
So, I got my razor knife and cut along the edge of the bottom and the one side. I pulled up the edge and it came out in almost one piece. Finally, a part of this project that I think I got lucky on.
Any stubborn stuff that didn't come off on the first pull, I scraped with an old putty knife or paint scraper. The stubborn stuff really wasn't that stubborn.
Some of the original interior was still under the replacement interior. It was tan with purple pin stripes. I left this, though I may ruff it up a bit with sandpaper before I install the new interior. Both interiors seemed to be nothing more than wallpaper and was really easy to remove.
A word of warning, the wallpaper interior in my trunk was pretty sharp on the edges and I got a small boo boo on my hand, a paper cut really, but it shocked me and could of been worse had I moved my hand just a little bit quicker.
For the next post, I plan on removing the broken leather handle straps.
Project time for this post : 1 hour
Total time spent on project so far : 31 hours 45 minutes
Total project cost so far : $33.62 USD
 |
| Ugly old steam trunk interior. Just hideous ! If this was the original interior I would of never removed it. |
 |
| Cut along the bottom edge and one side. I couldn't believe how easy this was. |
 |
| Once you cut the edges, just pull up. |
 |
| Take a putty knife or paint scrapper and remove any stubborn stuff that doesn't pull up on the first try. |
 |
| This was the original interior, still ugly but I would of never removed this if it wasn't already ruined by the replacement interior. |
 |
| That wallpapers sharp, luckily I was working slowly, if I would of moved my hand just a little bit quicker this could of been nasty. |
For the next post, I plan on removing the broken leather handle straps.
 |
| Broken steam trunk handle, this is the next part of the project.Then I'm back to sanding :( |
Total time spent on project so far : 31 hours 45 minutes
Total project cost so far : $33.62 USD
 |
| Steam trunk, now awaiting a new interior for its new life. |
Tuesday, January 31, 2012
Update- Still Sanding
Wow, this involves a lot of sanding. I put in another 7 hours of sanding. I still have about four more panels left. There are two panels where the handles are and two panels where the hinges are in the back. The good news is I will start removing the interior this week. This way I can get to the handles , remove them and finish up the sanding. I'll post the results of this shortly.
I spent a few more dollars on supplies. I needed more sandpaper, and a new wire brush tip for the Dremel tool. This adds another $11.00 dollars to the project. Check back soon for more updates.
Project time for this post : 7 hours
Total time spent on project so far : 30 hours 45 minutes
Total project cost so far : $33.62 USD
Friday, January 13, 2012
update
The blog is not going to have a posting schedule. As the work gets done I will be posting. Expect at least a weekly update , probably posted on Sunday.
This week I've been catching up, removing the paint and outside canvas of the trunk. Anyone thinking of doing this type of project should expect to do a lot of sanding. I've spent a considerable amount of time cleaning up the edges.
I would like to post more frequently, but I also want to take my time and make sure what I'm doing is getting done correctly. This means I can't rush through different parts of the project just because the work is boring or mundane. Believe me, sanding this thing is far from the funnest thing I've ever experienced in life. Anyway expect more updates soon, and thanks for stopping by.
Subscribe to:
Posts (Atom)