I'm going to start posting regular Sunday updates every Sunday. Because of the holiday madness, I am posting the first Sunday update on Monday. The Sunday update will be just a few quick lines on whats been going on over the week and any progress that has been made on the trunk restoration. So here is the first Sunday update unfortunately brought to you on Monday due to a very busy week.
Not a lot got done over the week. With Thanksgiving and the beginning of the holiday season starting I focused more on preparing for the holidays then working on the steam trunk. I hope everyone had a nice Thanksgiving. I started my Christmas shopping, prepared for Thanksgiving and did a little black Friday shopping. I got a great deal on some tools I needed on black friday. I found a plyer set for $9.98. It was a set of 6 and had one special plyer that's good for removing nails. At that price I had to purchase them and it should help in removing some of the trunk nails and a few parts that I have to remove.
This week I plan on catching up and getting the canvas removed from the trunk. This will be my main focus all week. I'll post the results and hopefully have this task accomplished sometime throughout the week. Check back soon for updates and thanks for stopping by "My Old Steam Trunk".
Monday, November 28, 2011
Monday, November 21, 2011
Stripping The Trunk Canvas
Finally, it's time to remove that hideous pink painted canvas. I started this the other day but didn't have anyone to take pictures, so today I will post a description of how to go about removing the canvas from your trunk restore project.
First I took a razor knife and ran it around the edges of each panel. I tried to slide the razor knife under the trim of the steam trunk without cutting into the trim itself. I used a cheap razor knife I purchased from the dollar store and it seemed to work fine. You could probably use a sharp knife for this but I like the flex of the razor knife. Being flexible, it helped to get into the tight spaces. When using a razor knife try to make sure your other hand is behind the blade, and try to cut away from you so you don't have an accident. Unlike the picture below, I like to live dangerously. I suppose once I take a trip to the emergency room that will cure me of this nasty habit.
After you run the razor knife around the edges of the steam trunk, take a paint scraper and start pulling up the canvas from the trunk. Some of it will come off very easily, other pieces will be much more difficult. Try not to gouge the wood while you do this, and always try and scrape with the grain of the wood.
The bottom panel came up pretty easily but it looks like there may have been some water damage at one time. This helped to loosen the ugly pink painted canvas. The center panel of the trunk was a little more difficult to remove.
I took a larger putty knife and tried to scrape off the more stubborn canvas. I plan on stripping most of the canvas off with the putty knife, the little bit that's left I'll try and remove with a fine sand paper. When I get to that point I'll post the pictures and add them to this tutorial.
This is how far I got after 1 hour and 45 minutes of scrapping. I'll be doing this throughout the week and post some pix of the end result when the paint and canvas are completely removed.
I'll add the 1 hour 45 minutes it took to do this to the overall project time and also add 1 dollar to the project cost for the razor knife I purchased. I now have 12 hours and 12 dollars and some change invested into this project.
Project time for this post : 1 hour 45 minutes
Total time spent on project so far : 12 hours
Total project cost so far : $12.64 USD
For some other tips on removing the canvas and paint from a steam trunk, click on the paint removal and canvas removal tags at the bottom of the post.
First I took a razor knife and ran it around the edges of each panel. I tried to slide the razor knife under the trim of the steam trunk without cutting into the trim itself. I used a cheap razor knife I purchased from the dollar store and it seemed to work fine. You could probably use a sharp knife for this but I like the flex of the razor knife. Being flexible, it helped to get into the tight spaces. When using a razor knife try to make sure your other hand is behind the blade, and try to cut away from you so you don't have an accident. Unlike the picture below, I like to live dangerously. I suppose once I take a trip to the emergency room that will cure me of this nasty habit.
 | |||||||
| Slide the razor knife under the edges of the trunk trim. |
 |
| Try to lift the edges of the canvas and loosen it up a bit. |
 |
| Going with the grain of the wood start removing the canvas. |
The bottom panel came up pretty easily but it looks like there may have been some water damage at one time. This helped to loosen the ugly pink painted canvas. The center panel of the trunk was a little more difficult to remove.
 |
| Take a putty knife or paint scraper to the more stubborn parts. Remember to scrape with the grain of the wood, and try be extra careful not to gouge the wood with your scraper |
I took a larger putty knife and tried to scrape off the more stubborn canvas. I plan on stripping most of the canvas off with the putty knife, the little bit that's left I'll try and remove with a fine sand paper. When I get to that point I'll post the pictures and add them to this tutorial.
 |
| This is how far I got after 1 hour and 45 minutes. I did get all the bottom panels all the way around. |
I'll add the 1 hour 45 minutes it took to do this to the overall project time and also add 1 dollar to the project cost for the razor knife I purchased. I now have 12 hours and 12 dollars and some change invested into this project.
Project time for this post : 1 hour 45 minutes
Total time spent on project so far : 12 hours
Total project cost so far : $12.64 USD
For some other tips on removing the canvas and paint from a steam trunk, click on the paint removal and canvas removal tags at the bottom of the post.
Thursday, November 17, 2011
The History Of Henry Likly And Company
There really isn't a lot of information available on these old steam trunks.My curiosity got the best of me and I decided to do some research on Henry Likly and the Henry Likly trunk company.Thanks to google books I found a couple old publications from the late 1800's and early 1900's that were in the public domain. Both books were on the history of Rochester N.Y. and had mini biographies about Henry Likly and his steam trunk enterprise.
Henry Likly was born on January 18th, 1836 in Perth Canada. In the spring of 1848 after his father died he and his mother moved to Rochester N.Y. He continued his education in the Rochester N.Y. public school system and upon graduation took an apprenticeship with the A.R. & T.H. Pritchard company where he learned the trade of manufacturing trunks and traveling bags.
Henry Likly was married in 1861 to Miss Helen E. Callister. They had two children, William C. Likly born March 31,1867 and Henry Likly born March 12, 1870. Henry Likly Sr. was a registered Republican, Freemason, and member of the Odd Fellows fraternity. Mr. Likly died on December 17, 1897.
The Henry Likly Trunk Company was established in 1844 as A.R. & T.H. Pritchard. Upon graduating from school Henry Likly took an apprenticeship with A.R & T.H.Pritchard and mastered his trade in the trunk manufacturing industry.In January of 1868 Mr. Likly was given a partnership in the company. The company then became A.R. & T.H. Pritchard & Company, three years later it became A.R. Pritchard & Likly.When Henry Likly and his brother in-law became the sole proprietors of the business the name was changed to Henry Likly & Company. This was the name from 1870 when A.R. Pritchard retired until 1925 when it simply became "Likly's".I couldn't find much more information after that or why the name was changed to just Likly's. As far as I can tell the company was ran by his children after his death in 1897.
In New York State the Henry Likly trunk company was the largest factory of its time. Located at 340 Lyell Ave in Rochester N.Y. the factory covered two acres of land, the building was 4 stories tall and utilized 60,000 square feet of space. During this period it was one of the best equipped manufacturing plants in the United States. The first floor was where the lumber was sawed and prepared, the second floor was the woodworking and box shop where the frames were made, the third floor was designated for trimming and finishing, and the top floor was probably reserved for the executives, sales and accounting. There products were shipped all over the U.S. and even to parts of Europe. For the local residents the Likly company also maintained a retail outlet at 96 State St in Rochester N.Y.
At its peak the company used over one million feet of lumber annually and turned out over 30,000 trunks yearly. The company produced all kinds of trunks mostly for traveling and packing but they also specialized in theatrical trunks and really fine high end trunks. This guy was the Louis Vuitton of Rochester.
References for this article.
History of Rochester and Monroe County,New York
William Farly Peck
The Pioneer Publishing Company 1908
Public Domain PDF file http://books.google.com
The industries of the city of Rochester
The Elstner Publishing Co. 1888
Public Domain PDF file http://books.google.com
I also used chacha.com to get the year when Mr.Pritchard retired and the name change to Likly's in 1925.
When I first began researching this I just wanted to know when the company was established and when it closed so I could get a general idea of how old my trunk was. It's probably safe to assume my steam trunk is over 100 years old. I definitely know it was made between 1847 and 1925. As I started researching this I got swept away in the nostalga of it all and a real admiration grew for Mr.Henry Likly himself.
I grew up in Buffalo N.Y. about an hour outside of Rochester N.Y.. Researching this I was reminded at just how great these two dying industrial cities had been at one time. Home to steel workers, and craftsman who drank beer from local breweries at corner pubs after a hard days work. The first cities of electricity. The blue collar towns where the residents built great products that were shipped throughout the U.S. and Europe. A time when people took pride in their craft,learned a trade, and truly climbed the corporate ladder. A time when the American dream was truly alive and well, the streets were paved with gold, and the sky was the limit for anyone who wanted to roll up there sleeves and apply themselves. Mr.Likly obviously did just that !
I don't think you could find a more appropriate story of the American dream then the story of Henry Likly. Here is a guy that moved here from another country, he was raised by a single mom, went to public school, apprenticed in a company learning the business from the ground up, and eventually owning the very company he started at. This is the America of my history books, this is the dream we were all taught about as children growing up, this is what made us a truly great country and why people from all over the world emigrated to this fine land. One hundred years later, the quality products this man created and envisioned are still beautiful works of art worthy of display and reminiscent of a different time in American history.
The time before outsourcing, or importing cheap parts from turd world countries with cheap labor. A time when things were produced localy and people supported each other and their local business's. This was the time when business men cared about their community, and were proud to be employers. This was the vision of the founding fathers and why they fought for this great land.
Do we still have this ? Could Henry Likly succeed today ? Would he of sold out his community for cheap foriegn labor and outsourced jobs ? I wonder what Henry Likly would of been like in today's world ? I'd like to think if Henry Likly were alive today he would somehow be above it all.
Who was Henry Likly ?
Henry Likly was born on January 18th, 1836 in Perth Canada. In the spring of 1848 after his father died he and his mother moved to Rochester N.Y. He continued his education in the Rochester N.Y. public school system and upon graduation took an apprenticeship with the A.R. & T.H. Pritchard company where he learned the trade of manufacturing trunks and traveling bags.
Henry Likly was married in 1861 to Miss Helen E. Callister. They had two children, William C. Likly born March 31,1867 and Henry Likly born March 12, 1870. Henry Likly Sr. was a registered Republican, Freemason, and member of the Odd Fellows fraternity. Mr. Likly died on December 17, 1897.
The History Of The Henry Likly Trunk Company.
The Henry Likly Trunk Company was established in 1844 as A.R. & T.H. Pritchard. Upon graduating from school Henry Likly took an apprenticeship with A.R & T.H.Pritchard and mastered his trade in the trunk manufacturing industry.In January of 1868 Mr. Likly was given a partnership in the company. The company then became A.R. & T.H. Pritchard & Company, three years later it became A.R. Pritchard & Likly.When Henry Likly and his brother in-law became the sole proprietors of the business the name was changed to Henry Likly & Company. This was the name from 1870 when A.R. Pritchard retired until 1925 when it simply became "Likly's".I couldn't find much more information after that or why the name was changed to just Likly's. As far as I can tell the company was ran by his children after his death in 1897.
In New York State the Henry Likly trunk company was the largest factory of its time. Located at 340 Lyell Ave in Rochester N.Y. the factory covered two acres of land, the building was 4 stories tall and utilized 60,000 square feet of space. During this period it was one of the best equipped manufacturing plants in the United States. The first floor was where the lumber was sawed and prepared, the second floor was the woodworking and box shop where the frames were made, the third floor was designated for trimming and finishing, and the top floor was probably reserved for the executives, sales and accounting. There products were shipped all over the U.S. and even to parts of Europe. For the local residents the Likly company also maintained a retail outlet at 96 State St in Rochester N.Y.
At its peak the company used over one million feet of lumber annually and turned out over 30,000 trunks yearly. The company produced all kinds of trunks mostly for traveling and packing but they also specialized in theatrical trunks and really fine high end trunks. This guy was the Louis Vuitton of Rochester.
References for this article.
History of Rochester and Monroe County,New York
William Farly Peck
The Pioneer Publishing Company 1908
Public Domain PDF file http://books.google.com
The industries of the city of Rochester
The Elstner Publishing Co. 1888
Public Domain PDF file http://books.google.com
I also used chacha.com to get the year when Mr.Pritchard retired and the name change to Likly's in 1925.
Your Bloggers Commentary.
When I first began researching this I just wanted to know when the company was established and when it closed so I could get a general idea of how old my trunk was. It's probably safe to assume my steam trunk is over 100 years old. I definitely know it was made between 1847 and 1925. As I started researching this I got swept away in the nostalga of it all and a real admiration grew for Mr.Henry Likly himself.
I grew up in Buffalo N.Y. about an hour outside of Rochester N.Y.. Researching this I was reminded at just how great these two dying industrial cities had been at one time. Home to steel workers, and craftsman who drank beer from local breweries at corner pubs after a hard days work. The first cities of electricity. The blue collar towns where the residents built great products that were shipped throughout the U.S. and Europe. A time when people took pride in their craft,learned a trade, and truly climbed the corporate ladder. A time when the American dream was truly alive and well, the streets were paved with gold, and the sky was the limit for anyone who wanted to roll up there sleeves and apply themselves. Mr.Likly obviously did just that !
I don't think you could find a more appropriate story of the American dream then the story of Henry Likly. Here is a guy that moved here from another country, he was raised by a single mom, went to public school, apprenticed in a company learning the business from the ground up, and eventually owning the very company he started at. This is the America of my history books, this is the dream we were all taught about as children growing up, this is what made us a truly great country and why people from all over the world emigrated to this fine land. One hundred years later, the quality products this man created and envisioned are still beautiful works of art worthy of display and reminiscent of a different time in American history.
The time before outsourcing, or importing cheap parts from turd world countries with cheap labor. A time when things were produced localy and people supported each other and their local business's. This was the time when business men cared about their community, and were proud to be employers. This was the vision of the founding fathers and why they fought for this great land.
Do we still have this ? Could Henry Likly succeed today ? Would he of sold out his community for cheap foriegn labor and outsourced jobs ? I wonder what Henry Likly would of been like in today's world ? I'd like to think if Henry Likly were alive today he would somehow be above it all.
 |
| Image taken from The industries of the city of Rochester The Elstner Publishing Co. 1888 |
Wednesday, November 16, 2011
Removing Trunk Canvas And Hideous Pink Paint
Started removing the trunk canvas and the hideous pink paint today. I didn't have anyone to take pictures so I will post step by step instructions and the pictures in the next post. Honestly, I really didn't expect this part of the restoration to be so difficult. I spent a little over an hour on this today and didn't even complete one panel. This is going to be a lot of work.
The darker parts of the trunk panel is the leftover canvas that still has to be removed. This thing is going to look so much better once the natural wood is exposed.
While stripping the canvas you have to be very careful not to gouge the wood. This part of the project is going to be very time consuming. Anyway, I just wanted to post an update. I'll make sure to post instructions and pictures in the next post.
Project time for this post : 1 hour 15 minutes
Total time spent on project so far : 10 hours 15 minutes
Total project cost so far : $11.64 USD
 | ||||||
| Rear trunk panel with all the canvas and hideous pink paint almost removed. This is 1 hour and 15 minutes of work. |
 |
| Small wood gouge in the rear trunk panel. This is why this part of the project is so time consuming. You have to make sure the razor knife or scraper doesn't get away from you. You'll know you are gouging the wood when the bottom of the canvas scraping has a small layer of wood still attached to it. I placed the shaving next to the gouge mark to show you what this looks like. |
While stripping the canvas you have to be very careful not to gouge the wood. This part of the project is going to be very time consuming. Anyway, I just wanted to post an update. I'll make sure to post instructions and pictures in the next post.
Project time for this post : 1 hour 15 minutes
Total time spent on project so far : 10 hours 15 minutes
Total project cost so far : $11.64 USD
Monday, November 14, 2011
Polishing Brass Work Completed
The brass work on the trunk is pretty much completed. I say pretty much because I probably could of spent another 8 hours on this and still wouldn't be completely satisfied. However, for the most part I think it came out pretty good. I spent an additional 6.5 hours on completing the brass work. This was accomplished in 4 polishing sessions throughout the week.There is no way I could sit there for 6.5 hours straight doing this.
What I thought was brass appears to be brass plated metal on many of the parts. The steel wool did take some of the brass finish off some of the parts.I really don't think there was any way around losing some of the brass finish as the parts were heavily corroded. However the parts now have a shiny, rustic, antique look to them which just adds to the rustic charm of the trunk. I think I'm going to keep this look. I could paint them, or buy some cruddy brush on brass look garbage at the craft store but I think that will take away from the rustic and original look I'm trying to achieve.
The final technique I came up with for polishing the brass was to rub it out with a number 4 coarse steel wool with a dime size drop of brass cleaner on it. After I did all the parts with the number 4 steel wool, I then redid them with a number 0 fine steel wool. When I used the number 0 steel wool I didn't add any brass cleaner and this really got the pieces shining again and added a nice luster to all the parts. They still have some nice antiquing and overall I am very happy with the end result. You can see some before and after pictures in the original post on this subject. Click here for original post.
I have to replace the handles, and the trunk straps, so knowing that I will be removing the fasteners for these parts I didn't spend a lot of time on them. I figure when I take them off, I will buff them out on a machine. These pieces are in really bad shape anyway , I will include some pictures of the trunk parts I remove and how I remove them in another post.
I plan on removing the ugly pink painted canvas this week. I can't wait to get rid of that God forsaken color. I know this trunk is going to look so much better once it's stripped down to its natural wood. I'll post those pictures in the next couple days.
As I posted earlier, I think this is gonna become more of a refurbish job than a restore.This trunk has been severely damaged over the years. The more I work on this thing, the more cracks and blemishes I find in it.
Project time for this post : 6.5 hours
Total time spent on project so far : 9 hours
Total project cost so far : $11.64 USD
 |
| This is me polishing the trunk brass. |
What I thought was brass appears to be brass plated metal on many of the parts. The steel wool did take some of the brass finish off some of the parts.I really don't think there was any way around losing some of the brass finish as the parts were heavily corroded. However the parts now have a shiny, rustic, antique look to them which just adds to the rustic charm of the trunk. I think I'm going to keep this look. I could paint them, or buy some cruddy brush on brass look garbage at the craft store but I think that will take away from the rustic and original look I'm trying to achieve.
The final technique I came up with for polishing the brass was to rub it out with a number 4 coarse steel wool with a dime size drop of brass cleaner on it. After I did all the parts with the number 4 steel wool, I then redid them with a number 0 fine steel wool. When I used the number 0 steel wool I didn't add any brass cleaner and this really got the pieces shining again and added a nice luster to all the parts. They still have some nice antiquing and overall I am very happy with the end result. You can see some before and after pictures in the original post on this subject. Click here for original post.
I have to replace the handles, and the trunk straps, so knowing that I will be removing the fasteners for these parts I didn't spend a lot of time on them. I figure when I take them off, I will buff them out on a machine. These pieces are in really bad shape anyway , I will include some pictures of the trunk parts I remove and how I remove them in another post.
I plan on removing the ugly pink painted canvas this week. I can't wait to get rid of that God forsaken color. I know this trunk is going to look so much better once it's stripped down to its natural wood. I'll post those pictures in the next couple days.
As I posted earlier, I think this is gonna become more of a refurbish job than a restore.This trunk has been severely damaged over the years. The more I work on this thing, the more cracks and blemishes I find in it.
Project time for this post : 6.5 hours
Total time spent on project so far : 9 hours
Total project cost so far : $11.64 USD
Tuesday, November 8, 2011
Henry Likly Newspaper Ad From 1890
I'm still polishing brass, I've been putting in at least an hour a day. Hopefully by the end of the week the brass work on this trunk will look half way decent.
While I was doing some research into the Henry Likly trunk company, I found this old advertisement from around 1890. I thought it was pretty cool so I posted it here.
 I'll be posting more research, and information about the Henry Likly Trunk and Bag Company through out the week for anyone interested. Now I have to get back to polishing some brass.
While I was doing some research into the Henry Likly trunk company, I found this old advertisement from around 1890. I thought it was pretty cool so I posted it here.

Monday, November 7, 2011
About The Blogger
I suppose I should introduce myself and tell any interested readers a few things about myself and this blog. Most people call me Richey, some people call me moron and a few other select words we won't use here. Hopefully you'll choose to call me Richey. I'm a single 42 year old male living in Buffalo N.Y. This is the second blog that I've written. The first blog was a humor blog that lasted about 3 years. I won't link to it here as the blog was a bit blunt, crude, and is certain to offend a few people. I really enjoyed writing that blog and had a lot of fun with it over the years yet felt it was time to move on.
I decided to create this blog after I started researching steam trunk restoration. At the time of this writing I didn't find a lot of information out there on this subject. I wanted to start a more serious blog, so I thought why not try a D.I.Y. blog. The steam trunk project seemed like it would not only make an excellent D.I.Y project but also great subject matter for a D.I.Y. blog. Bonus ! Thus the creation of the My Old Steam Trunk blog.
I have no college education and it probably shows in my writing skills. However, I do enjoy writing and hope over the years my writing skills improve through blogging. Although I'm not writing the great American novel, at least I'm writing something. Trying to improve my writing is one of the main reasons I blog. I've considered taking a creative writing course I just have to get off my lazy butt and do it. Any skill we don't use degrades with time, so blogging helps keep my writing and grammatical skills or lack there of in check.
As you read through my blog entries I'm sure you'll find grammatical errors and the occasional typo or misspelling. I really try to keep it to a minimum though. Thank God for spell check. With this being a D.I.Y. blog the important thing to me and hopefully to you , will be in explaining the different techniques, and ways of restoring one of these old vintage steam trunks. Hopefully a few people surfing the world wide web will find the information here useful.
As far as steam trunk restoration goes, I have no experience. This is my first attempt at this type of project. This could end up being a huge fail or a great learning experience. I plan on taking my time, researching as much as possible, posting the research in the blog, and hopefully helping out a few other people who might be attempting such a project. I'm all thumbs so the good news is, if I can do this, I'm pretty sure just about anyone can.
Other stuff about me. I'm currently between jobs. I'm 42 years old and don't know what I want to be when I grow up. My favorite T.V. show is the Sons Of Anarchy, although I try not to watch much T.V., I'm more of a reader. I use to D.J. dance music for friends and occasionally out at local night clubs. I love house music, and old skool funky breaks. I sold my turntables a few years back but found I missed it so I recently purchased an mp3 controller and mix at home as a hobby. Still mixin the house and breakbeats. When I'm not mixing music, writing this blog, watching The Sons Of Anarchy, or working on the steam trunk, you can usually find me reading. I read a lot. My favorite authors are Ginsberg, Kerouac, William S. Burroughs, Crowley, Eliphas Levi, Terence McKenna, and Hunter S. Thompson, just to name a few. Everything else about me is a bit mundane and I won't bore you with the details.
Thanks for taking an interest in this post, and I hope you find the rest of the information in this blog useful.
Sunday, November 6, 2011
Polishing Trunk Brass And Metal Parts
This has to be the most mundane, monotonous, boring task I have ever undertook ! I now have two things I hate in life, cleaning dishes and cleaning brass. So I have some good news and some bad news. The good news is everyone seems to want brass work on their trunk and that appears to be what I have. The bad news is cleaning extremely corroded, and tarnished brass absolutely sucks for lack of a better word.
So I got about ten minutes and a quarter beer into the project and realized the steel wool I purchased was too fine. I got a zero grade steel wool and that just wasn't cutting through the tarnish, grime and corrosion. I stopped what I was doing, went down to the hardware store and finally spent some money. I purchased some dust masks $2.97, Brasso brass cleaner $3.49, some number 4 steel wool $2.59, and some number 0 steel wool $2.59.
I returned home, selected some music that would motivate me, some upbeat funky breaks and began attacking the brass work with a ferocious attitude. The process I found most successful was to apply a dime size dollop of brass cleaner to the number 4 steel wool and then rub the heck out of the part. I tried to be as careful as possible not to get the brass cleaner on the leather trim, and ugly pink painted canvas. For this reason I'm glad I decided not to remove it and expose the natural wood. I then took a piece of number 0 steel wool and removed the coarseness of the number 4 steel wool.It's hard to tell from the pictures but it really made a huge difference.
I did this for two and a half hours and although I began to see some results there is still a lot of work to be done. The following are some before and after pictures. Chances are I'm not going to end up with a highly polished mirrored finish on most of these parts, but they will look much better when they are finished. The cleaning did leave some dark discoloration on the canvas which would of ended up on the wood had I not left the canvas in place. Now when I do remove the canvas from the steam trunk I should have some fairly clean natural wood to work with.
I was tempted to buy a stripping attachment for a power drill when I was at the hardware store, but was advised against that.The technique that I've described in this post will help protect the wood and leather that the brass parts are attached to. I do have some skills using a Dremel Tool so I may invest in one to put a nice finish on these parts.
You might be wondering why I just didn't remove all the parts from the trunk and then refinish them ? I would strongly discourage this. You have to realize most of these steam trunks are over 100 years old. The less parts you remove the less chance you have of breaking something. The less you bang on these things the better. The goal here is to improve the appearance of the steam trunk and do as little damage as possible. Not to mention if your trying to do a proper restore you want to change as little as possible.
I plan on doing this all week for a couple hours a day. I should be able to get most of the corrosion and dirt off these parts and return them close to there original luster. In the mean time I'll post some information about the trunk, try to find some trunk history on the Henry Likly Steam Trunk Company, and maybe a little information about me. Thanks for stopping by My Old Steam Trunk and I hope you found this post helpful.
Project time for this post 2 hours 30 minutes.
Total time so far 3 hours 45 minutes.
Cost spent on this post : $11.64
Total project cost so far : $11.64
So I got about ten minutes and a quarter beer into the project and realized the steel wool I purchased was too fine. I got a zero grade steel wool and that just wasn't cutting through the tarnish, grime and corrosion. I stopped what I was doing, went down to the hardware store and finally spent some money. I purchased some dust masks $2.97, Brasso brass cleaner $3.49, some number 4 steel wool $2.59, and some number 0 steel wool $2.59.
 |
| What I used to clean the brass work on the steam trunk. |
I did this for two and a half hours and although I began to see some results there is still a lot of work to be done. The following are some before and after pictures. Chances are I'm not going to end up with a highly polished mirrored finish on most of these parts, but they will look much better when they are finished. The cleaning did leave some dark discoloration on the canvas which would of ended up on the wood had I not left the canvas in place. Now when I do remove the canvas from the steam trunk I should have some fairly clean natural wood to work with.
 |
| It's tough to get a good picture of the change, but I assure you it is a dramatic difference. |
 | |
| This piece came out the best. I can't believe what a difference this made. |
I was tempted to buy a stripping attachment for a power drill when I was at the hardware store, but was advised against that.The technique that I've described in this post will help protect the wood and leather that the brass parts are attached to. I do have some skills using a Dremel Tool so I may invest in one to put a nice finish on these parts.
You might be wondering why I just didn't remove all the parts from the trunk and then refinish them ? I would strongly discourage this. You have to realize most of these steam trunks are over 100 years old. The less parts you remove the less chance you have of breaking something. The less you bang on these things the better. The goal here is to improve the appearance of the steam trunk and do as little damage as possible. Not to mention if your trying to do a proper restore you want to change as little as possible.
I plan on doing this all week for a couple hours a day. I should be able to get most of the corrosion and dirt off these parts and return them close to there original luster. In the mean time I'll post some information about the trunk, try to find some trunk history on the Henry Likly Steam Trunk Company, and maybe a little information about me. Thanks for stopping by My Old Steam Trunk and I hope you found this post helpful.
Project time for this post 2 hours 30 minutes.
Total time so far 3 hours 45 minutes.
Cost spent on this post : $11.64
Total project cost so far : $11.64
Saturday, November 5, 2011
First Some Brass Work
I started removing the ugly pink paint the other night. If you haven't realized yet I'm very excited about getting rid of this hideous color. I know once that ugly pink paint is removed , and the natural wood underneath is revealed, this thing is going to look soooo much better.

As I started stripping the ugly pink paint from the bottom rear panel, I noticed how bad the corner brackets and other metal parts had corroded with time. Now the ugly pink paint was applied over the original canvas on the outside of the trunk. Sad that someone did that, however the good news is that the natural wood underneath is protected by the ugly pink painted canvas. I then thought why would I remove all the ugly pink painted canvas and leave the natural wood exposed while I clean and polish the metal pieces. So after removing the paint covered canvas from the bottom panel the other night I decided to leave the rest and clean and polish the metal work on the trunk today. When I return to removing the paint from the rest of the trunk I will post how I did it with instructions.
I did discover a small crack on the bottom rear panel after removing the canvas. I'll have to figure out what to do about that later. Any suggestions ?
I ran to the store this afternoon, got a couple frozen pizzas for when I get hungry, gulped down an energy drink, got a 12 pack of some decent beer, and plan on polishing and steel wooling the heck out of the brass work and other metal pieces on the trunk. I'll post the details of how I did that and the results in my next blog post.

It only took about 15 minutes to remove the ugly pink painted canvas from the bottom rear panel of the trunk so I'll add that to the project time now. This gives a work hour total of 1 hour and 15 minutes so far. Zero dollars invested.
Thursday, November 3, 2011
Clear Some Space !
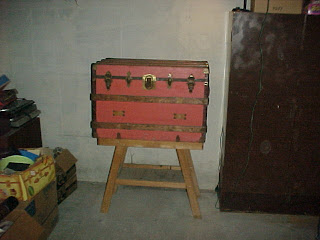
Before I remove the ugly pink paint, I think I should clear out a work space. While I was cleaning the leather trim I had the trunk on the floor and I realised that I was going to be bending down a lot for this project. I figured I should get the trunk up on something so my lazy butt isn't bending over every 5 minutes. The old spinal cord isn't what it used to be ! This trunk obviously needs a lot of work, I plan on putting in many hours, so I may as well get comfortable.

I reorganized this disaster of a mess, moved the hunting equipment that nobody uses any more onto an old folding table, and cleared off this old work bench which is actually a toy workbench from when I was a child. It is solid wood, has a little shelf underneath it for tools and various doodads and whatnots but it was a bit wobbly. I tightened up the screws, got the wobble out of it and placed the steam trunk on top of it. PERFECTO ! It seems to be the perfect height. This should make life a bit easier !
Suggestion: If your planning on restoring one of these old steam trunks, clear out a nice work space for yourself. Make sure you have plenty of light so you can see what you're doing. Get yourself comfortable, find a place to get your tools organized, make sure the trunk sits at a comfortable height and get ready for some work !
Cost And Time : I'm adding this to project time. It took about 30 minutes making the project time total 1 hour. Cost for a clean, organized workspace 0 dollars but absolutely priceless. Making the total investment in this project 0 bucks. So far I'm getting off pretty cheap Don't worry I suspect I'll be shelling out some cash soon.

I reorganized this disaster of a mess, moved the hunting equipment that nobody uses any more onto an old folding table, and cleared off this old work bench which is actually a toy workbench from when I was a child. It is solid wood, has a little shelf underneath it for tools and various doodads and whatnots but it was a bit wobbly. I tightened up the screws, got the wobble out of it and placed the steam trunk on top of it. PERFECTO ! It seems to be the perfect height. This should make life a bit easier !
Suggestion: If your planning on restoring one of these old steam trunks, clear out a nice work space for yourself. Make sure you have plenty of light so you can see what you're doing. Get yourself comfortable, find a place to get your tools organized, make sure the trunk sits at a comfortable height and get ready for some work !

Cost And Time : I'm adding this to project time. It took about 30 minutes making the project time total 1 hour. Cost for a clean, organized workspace 0 dollars but absolutely priceless. Making the total investment in this project 0 bucks. So far I'm getting off pretty cheap Don't worry I suspect I'll be shelling out some cash soon.
Wednesday, November 2, 2011
Is It Leather Or Steel ?
I started this project last night. I had about an hour to kill before this t.v. show came on , so I decided to go downstairs and play around with the steam trunk. I was inspecting it, wondering where to begin, and assessing the years of abuse and damage that the steam trunk had endured. There's just so much work to be done to this thing.
While looking at a crack in what I thought was metal trim, I realized it was leather. The leather had grown so old and dried out it appears to be almost petrified. It really looked and felt like metal trim. Not knowing where to begin, I decided to give the leather a bit of a treatment and see if I could soften it up a bit.

I should of taken a picture of the crack but will get back to that in another post when we try to actually repair the crack. For now , the task at hand was to apply some leather conditioner to the trim and see if we could soften it up a bit. I had some leather cleaner/conditioner in my shoebox , so I got an old sock put some conditioner on it and started working it into the leather trim. As the dirt came off, the trim lost its black, brassy appearance and began to take on the brown hue of leather again.
I did this for two reasons:
If your restoring one of these and the leather is old and dried out I would suggest doing this. You will need:
So far I have 30 minutes invested into this project and because I had the leather conditioner already it cost me nothing. 30 minutes 0 dollars so far.
The next thing I plan on doing is getting rid of that ugly pink paint !
While looking at a crack in what I thought was metal trim, I realized it was leather. The leather had grown so old and dried out it appears to be almost petrified. It really looked and felt like metal trim. Not knowing where to begin, I decided to give the leather a bit of a treatment and see if I could soften it up a bit.

I should of taken a picture of the crack but will get back to that in another post when we try to actually repair the crack. For now , the task at hand was to apply some leather conditioner to the trim and see if we could soften it up a bit. I had some leather cleaner/conditioner in my shoebox , so I got an old sock put some conditioner on it and started working it into the leather trim. As the dirt came off, the trim lost its black, brassy appearance and began to take on the brown hue of leather again.
I did this for two reasons:
- I had nothing better to do and what could it hurt.
- If I worked on the leather trim in this dried out condition it would just crack apart.
If your restoring one of these and the leather is old and dried out I would suggest doing this. You will need:
- An old sock
- A good leather conditioner
So far I have 30 minutes invested into this project and because I had the leather conditioner already it cost me nothing. 30 minutes 0 dollars so far.
The next thing I plan on doing is getting rid of that ugly pink paint !
DIY Steam Trunk Restoration

My old steam trunk has been sitting around this house for several years. There is a bit of history to this steam trunk that I will share in another post.All I'll say for now is that it sat around my house for a very long time. I was watching a t.v. show and seen one of these finished and thought I could do that.
My first step was to do some internet research to see what was involved in restoring one of these things. I thought for sure I would find a few blogs pertaining to this , I was really surprised to find very limited information on this subject. I found a few websites with restoration tips and helpful info but nothing detailing a step by step process. So I thought what a great blog idea. Thus the birth of the My Old Steam Trunk blog.
The plan here will be to show you my restoration project from day one, itemize the products purchased for the restore, the tools used, finding replacement parts, tallying the costs involved, and logging the amount of time spent on this restoration project.
I plan on posting regular step by step instructions on how I restore and recondition this trunk. This is my second internet blog, and my first attempt at restoring a steam trunk. Hopefully this doesn't turn into the biggest blog fail in the history of the internet. You can watch the project grow from day one, and watch me either royally fudge this up, or create a finished product that I can place in my living room or bedroom. How this ends only time will tell.
Whether your restoring one of these yourself, or just curious how this project turns out, stop back for updates and feel free to leave comments, tips, and ideas.
Thanks for stopping by My Old Steam Trunk.
Subscribe to:
Comments (Atom)